How to create an installer using Inno Setup | |
| InnoSetup is an open source compiler to create installers on windows. It is free and provides a rich feature set. You can create professional looking installers for the end user. | |
| In this article we will explain you the basic concepts and steps involved in creating a simple setup of your C++,VB .Net, C#... Project. | |
| You can download InnoSetup here | |
| You can download Inno Script Studio | |
| Creating the installer using Inno Setup involves the following two steps: | |
| Create Inno Script file | |
| Compile the Script file | |
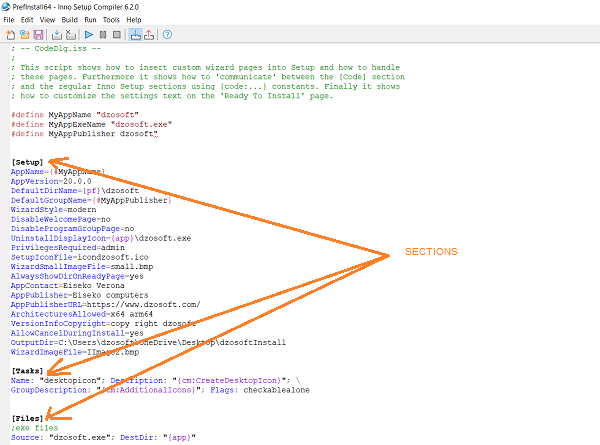
| InnoSetup script file is a simple text file which is similar to .INI files with the extension .ISS. In this script file the contents are arranged in sections. | |
| These scripts are easy to understand and uses a simple syntax. The section starts with the Section Name which is enclosed in square brackets. Each section handles a | |
| specific function of the installation. | |
 | |
How to Create an Inno Script file | |
| -You can use any text editor like ultraedit or notepad or other editor that you prefer. | |
| -Innosetup built in editor | |
| InnoSetup built in editor comes with an excellent wizard which takes you through the stages and creates the script file. Later you can modify the script file in the editor | |
| which has the following options syntax highlighting and one click installation. | |
| -Third party Editor (Inno-script-studio) | |
| The Inno script studio is free and excellent tool which helps you create an InnoSetup quickly and easily. It comes with a wizard that is similar to InnoSetup wizard. We can | |
| then use the graphical interface provided by the tool to edit our script easily. In this article we will look into this tool. | |
| you can download Inno script studio from https://www.kymoto.org/products/inno-script-studio | |
| First Install Inno setup and then Inno-script-studio. Installation is simple and straight forward. | |
Step 1: | |
| Creating Script File (.iss) | |
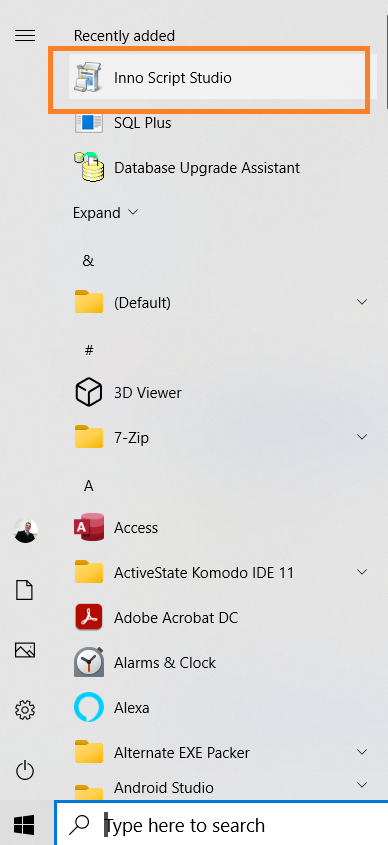
| Go to Start->All Programs. You will see Script Studio installed here. Click Inno Script Studio. | |
 | |
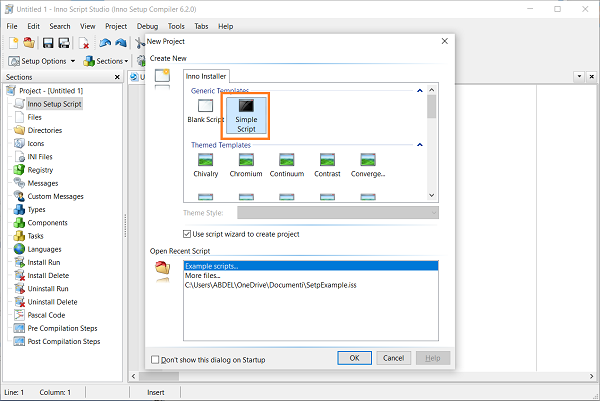
| This will bring up the new project wizard as in the following image. Create a new script using the script wizard. Click Ok | |
| Click on Sample Script and keep use script wizard to create project checked. | |
 | |
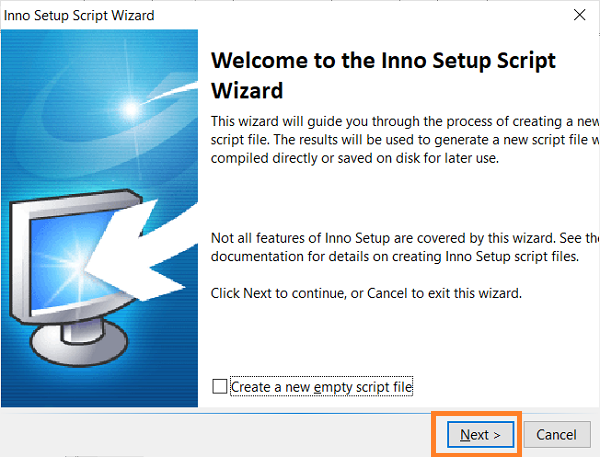
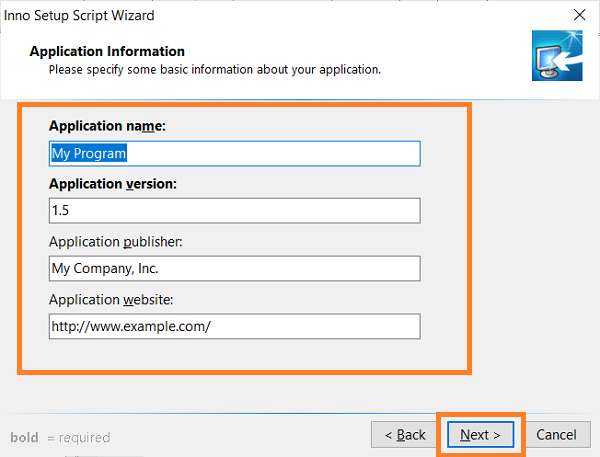
| Click Next on Welcome screen. This will bring up the Application Information form. Enter Application Name, Application Version, Application Publisher, Application, | |
| Website as in the following screenshot. Click on Next once finished. | |
 | |
| Click Next | |
 | |
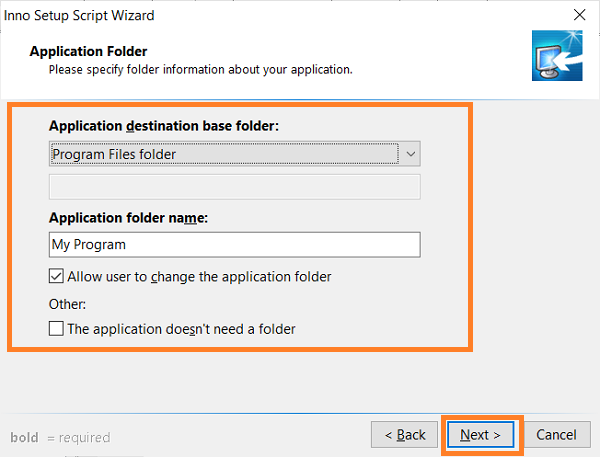
| This will bring up the Application Folder dialogue box. In this section we are asked where our application needs to be installed. Select Program Files folder if you wish to install | |
| it in program folder or else select custom and specify the folder for the application to install. Click on Next once finished. | |
 | |
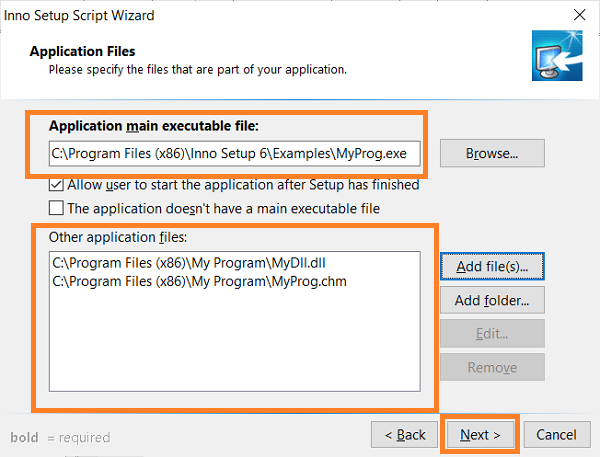
| The next screen is an Application Files dialogue box. Under Application main executable files Browse and select the main executable file of the application. In Visual Studio this is | |
| under Project folder, Bin, then Release folder. I have included MyProg.exe as the main executable file. | |
| Under Add Files select all the assemblies referenced by the application like assembly files (dll) from the Project folder, Bin, then Release folder. Third party assemblies if used must | |
| be included. No need to include dot net assemblies. I have included MyDll.dll and MyProg.chm from my sample application. | |
| Click on Next to go to the next screen. | |
 | |
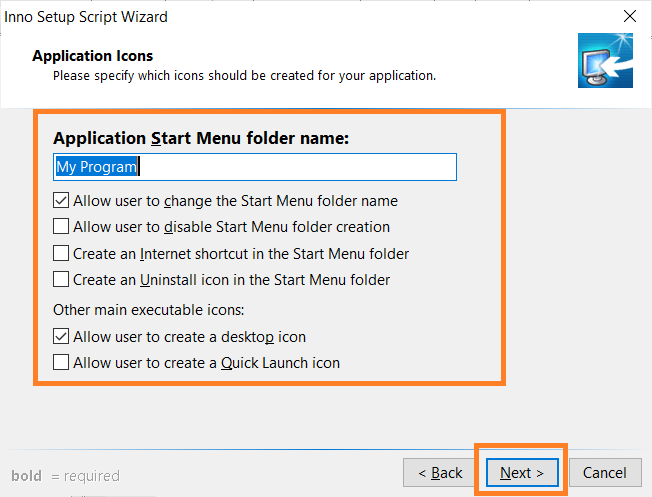
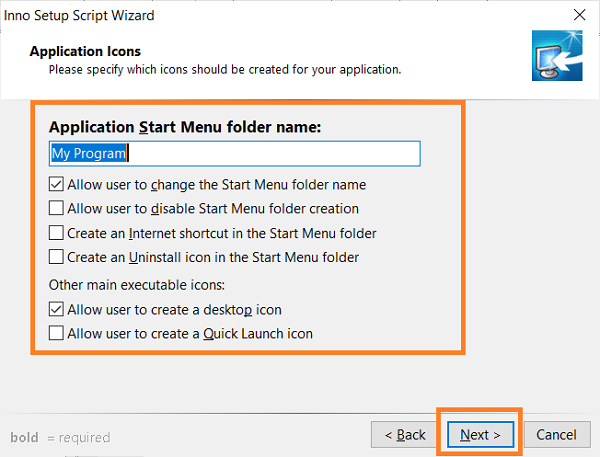
| The next screen that comes is Application Icons screen. Enter Start Menu Folder name here and choose the other parameters as appropriate. | |
| Click Next once finished. | |
 | |
 | |
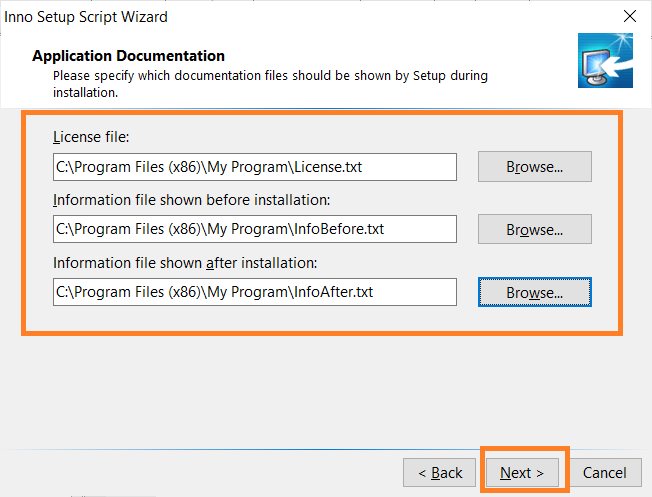
| The next screen is Application Document screen. Any license file/Software Agreement and any information to be shown before or after the installation are specified here. | |
| You can create a text file in notepad and select the files here. Click on next once finished. | |
 | |
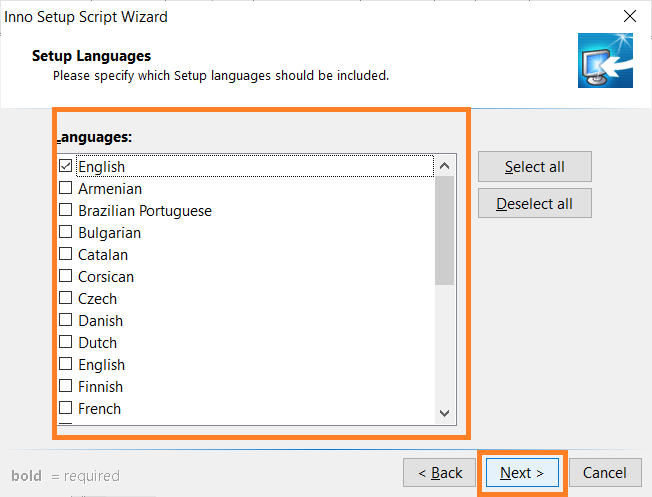
| The Next screen is language selection. Select the languages supported. Click on next to bring up the Compiler Settings. Select the output folder for the setup file. | |
| Click on Next | |
 | |
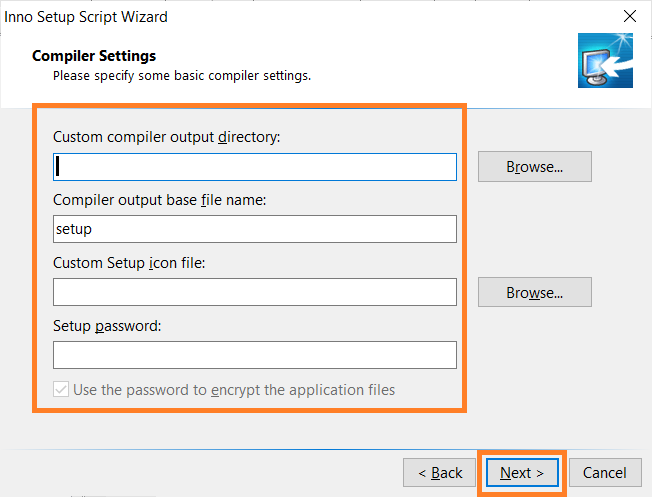 | |
| Click on Next | |
 | |
| Click on Next | |
 | |
| Click on Next | |
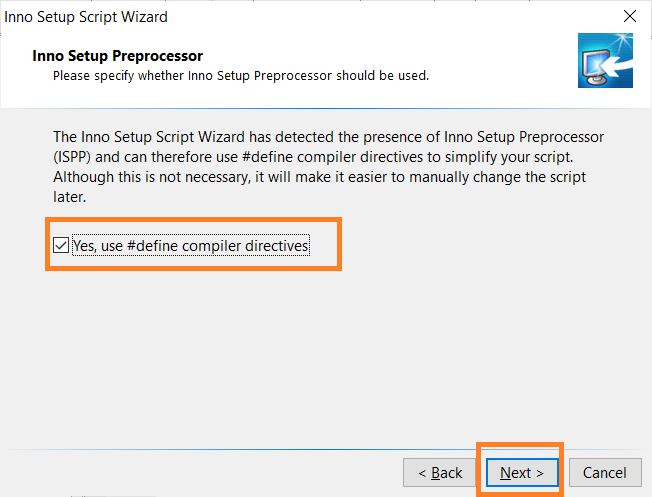
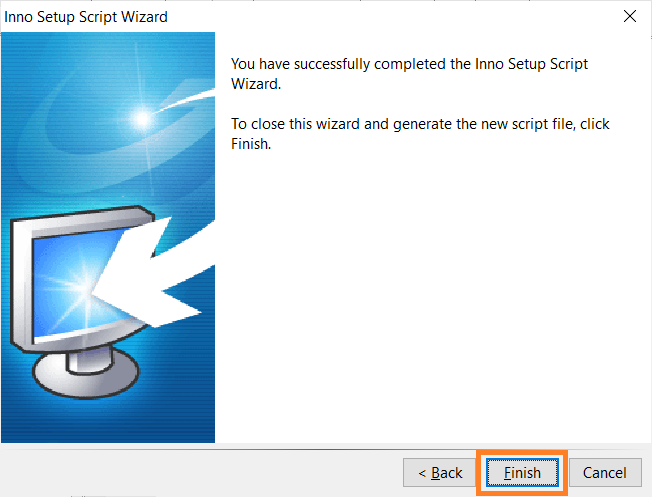
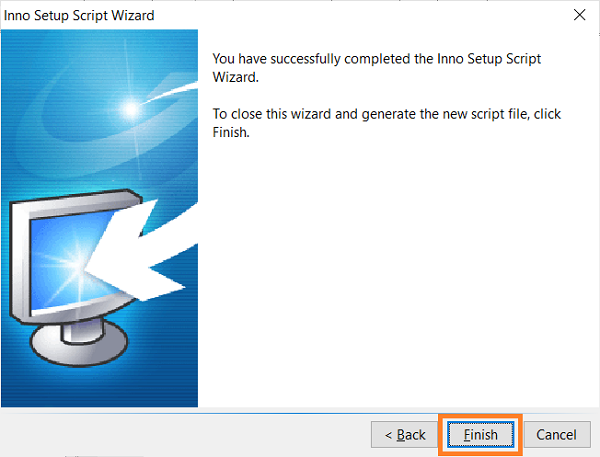
| Next screen is Inno Setup Preprocessor. Keep the checkbox selected and click Next. Click on Finish in the last screen. | |
 | |
 | |
Save and Create the Setup | |
Modify the Setup | |
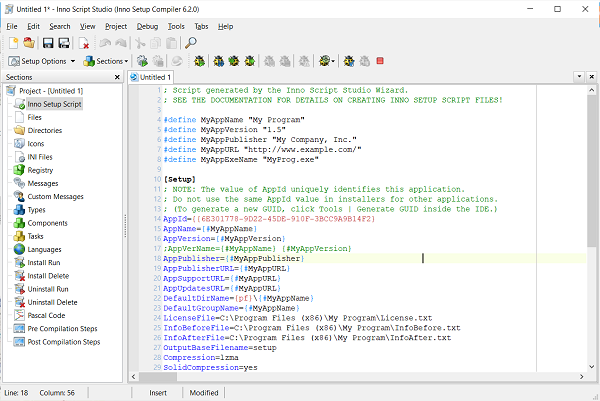
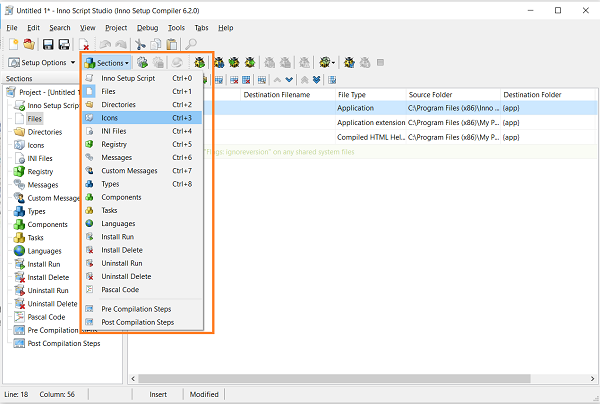
| You can add files / change the settings / customize the installer using the IDE as in the following screenshot: | |
 | |
| You can customize your setup | |
 | |
| Enjoy. | |

ALL ABOUT COMPUTER SCIENCE AND TECHNOLOGY
It might also interest you |
How to install Inno Studio Script |
How to create an installer from Visual Studio |
 |
dzosoft.com © 2022 - 2026 Author: Ing. A. Nasri. All rights reserved.
Cookie Preferences
We use cookies to help you navigate efficiently and perform certain functions. You will find detailed information about all cookies under each consent category below. The cookies that are categorised as ”Necessary” are stored on your browser as they are essential for enabling the basic functionalities of the site.
We also use third-party cookies that help us analyse how you use this website, store your preferences,
and provide the content and advertisements that are relevant to you. These cookies will only be stored in your browser
with your prior consent.
You can choose to enable or disable some or all of these cookies but disabling some of them may affect your browsing experience.
By clicking “Accept”, you consent to the use of cookies as described in our
Privacy Policy.
Cookie Categories
Necessary
Necessary cookies are required to enable the basic features of this site, such as providing secure log-in or adjusting your consent preferences. These cookies do not store any personally identifiable data.
Functional
Functional cookies help perform certain functionalities like sharing the content of the website on social media platforms, collecting feedback, and other third-party features.
Analytics
Analytical cookies are used to understand how visitors interact with the website. These cookies help provide information on metrics such as the number of visitors, bounce rate, traffic source, etc.
Performance 
Performance cookies are used to understand and analyse the key performance indexes of the website which helps in delivering a better user experience for the visitors.
Advertisement
Advertisement cookies are used to provide visitors with customised advertisements based on the pages you visited previously and to analyse the effectiveness of the ad campaigns.
