| |
| |
| |
How to create Transparent Image in Paint.NET on Windows step-by-step |
| |
| Create Transparent Image in Paint.NET on Windows |
| We can use Paint.NET to remove the background we want from the image. The foreground objects or items in the |
| image will remain as it is and the background pixels will have nothing. |
| Once the image will be ready, you can save it as a PNG image or some other supported format that |
| supports a transparent background. |
| |
 |
| | | Paint.NET also comes with the feature to set the opacity level for the entire image. |
| So, instead of making the image background transparent, you can simply make the entire |
| image semi-transparent or set the opacity level as per your needs to adjust image transparency. |
| This post covers both ways. |
| |
Create a Transparent Image in Paint.NET |
| |
| |
Step 1: |
| Open Paint.NET using its desktop shortcut or Start menu. After that, use the File menu in Paint.NET to open |
| an image whose background you want to remove. |
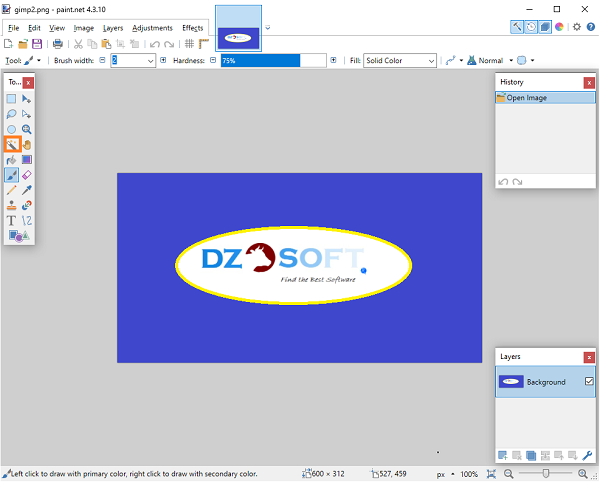
| After that, press the F5 hotkey to open its Tools. It will appear on the left side (see image below). |
| There, select the Magic Wand tool. |
| |
 |
| | | |
Step 2: |
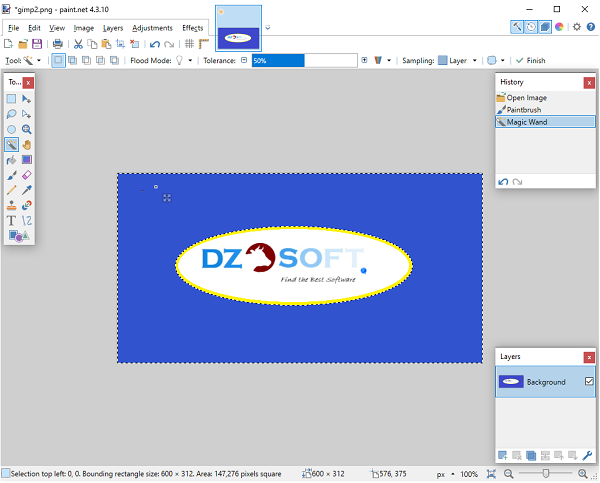
| Now press on hold Ctrl key and use the left mouse button to select areas using the Magic Wand tool that you |
| want to remove or make transparent. Carefully select areas. If the Magic Wand tool selects other areas or |
| pixels that you don’t want to remove from the image, then adjust the tolerance level using the available |
| slider, as visible in the screenshot below. |
| |
Step 3: |
| You might need to repeat this process multiple times until you get the exact areas or pixels. |
| In addition to that, you can also take the help of the Zoom-in option and Eraser tool to select correct |
| areas and remove/add pixels. This might take time but you have to do it precisely to get a good output. |
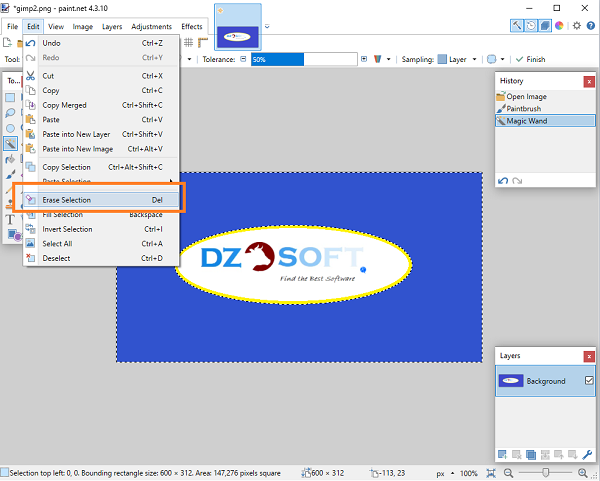
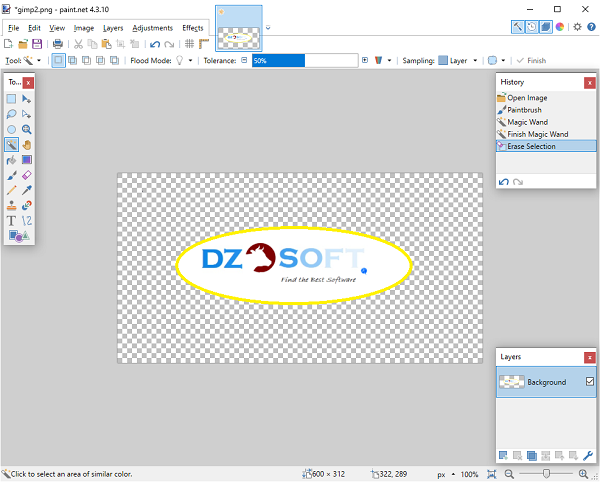
| Once you’ve done that, press the Delete key. You will notice that all those areas are removed and the |
| background is transparent now. |
| Finally, you can save the image as PNG or another format that supports transparent background using |
| Save as available in the File menu. |
| |
Set the opacity level to adjust image transparency |
| |
| |
 |
| | | In case, you don’t want to make the image background transparent but adjust the transparency level |
| (between 0-255) of the whole image, then you can use other steps. |
| For that, open Paint.NET and add an image. Now press F4 hotkey, you will see the Layer Properties box. |
| In that box, move the Opacity slider from left to right to adjust the image transparency from 0 to 255. |
| Less will be the opacity, more will be the transparency level of the image, and you will also be able |
| to see the changes in the image in real-time. |
| |
Step 4: |
| Settings opacity level to 0 will make the image completely invisible and that won’t make any sense. |
| So, adjust the opacity level as per your needs. When the transparency level is set, press the OK button. |
| After that, you can use Save as in the File menu to store the output image in any folder. |
| |
 |
| | | Enjoy. |


 EN
EN 
 Español - ES
  Français - FR


